Visual Studio で、「ASP.NET と Web 開発」ワークロード内の「ASP.NET Core Web アプリ」を選択すると、C#によるWebアプリケーションを作成することができる。
今回は、Visual Studioによる画面操作で、C#によるWebアプリケーションを作成してみたので、その手順を共有する。
前提条件
下記サイトの手順に従って、Windows端末上でC#の開発環境を作成済であること。

やってみたこと
「ASP.NET と Web 開発」ワークロードのインストール
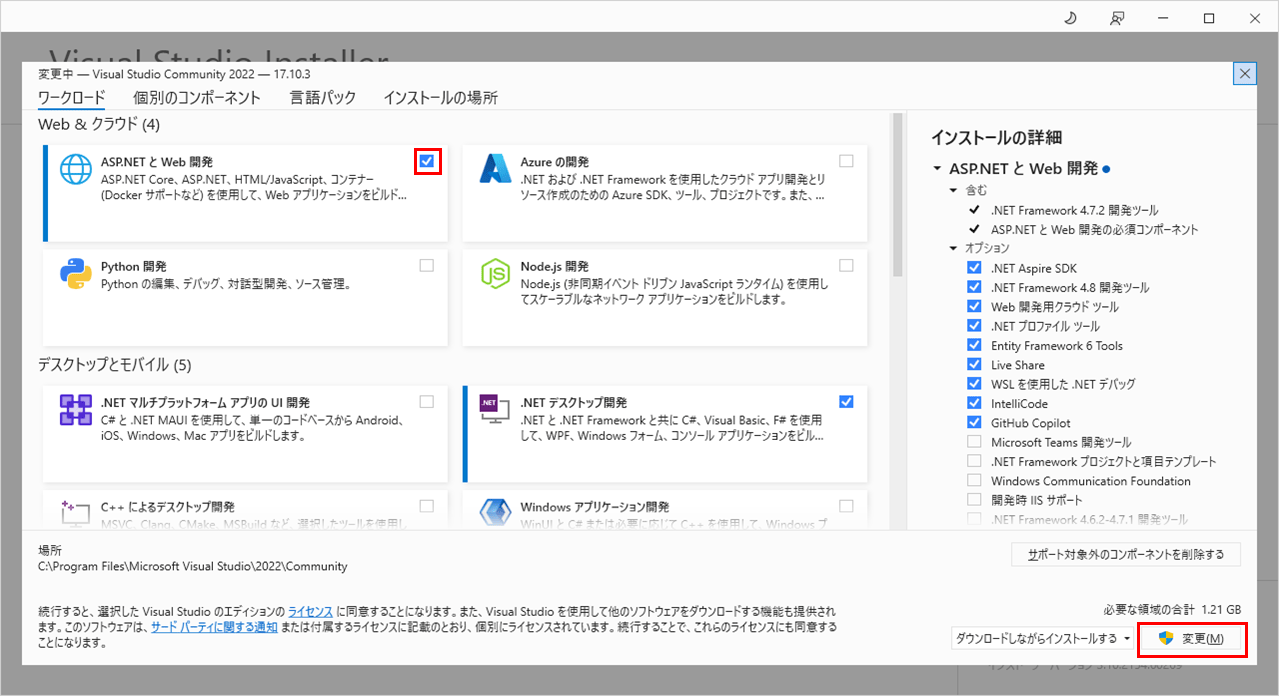
C#でWebアプリケーションを作成するには、Visual Studio内の「ASP.NET と Web 開発」ワークロードをインストールする必要がある。その手順は、以下の通り。
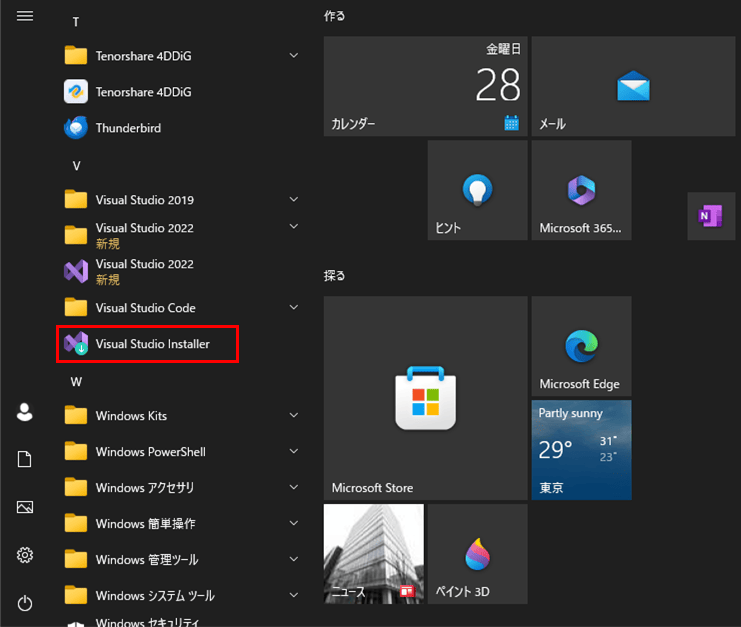
1) Windowsメニューから「Visual Studio Installer」を選択する。
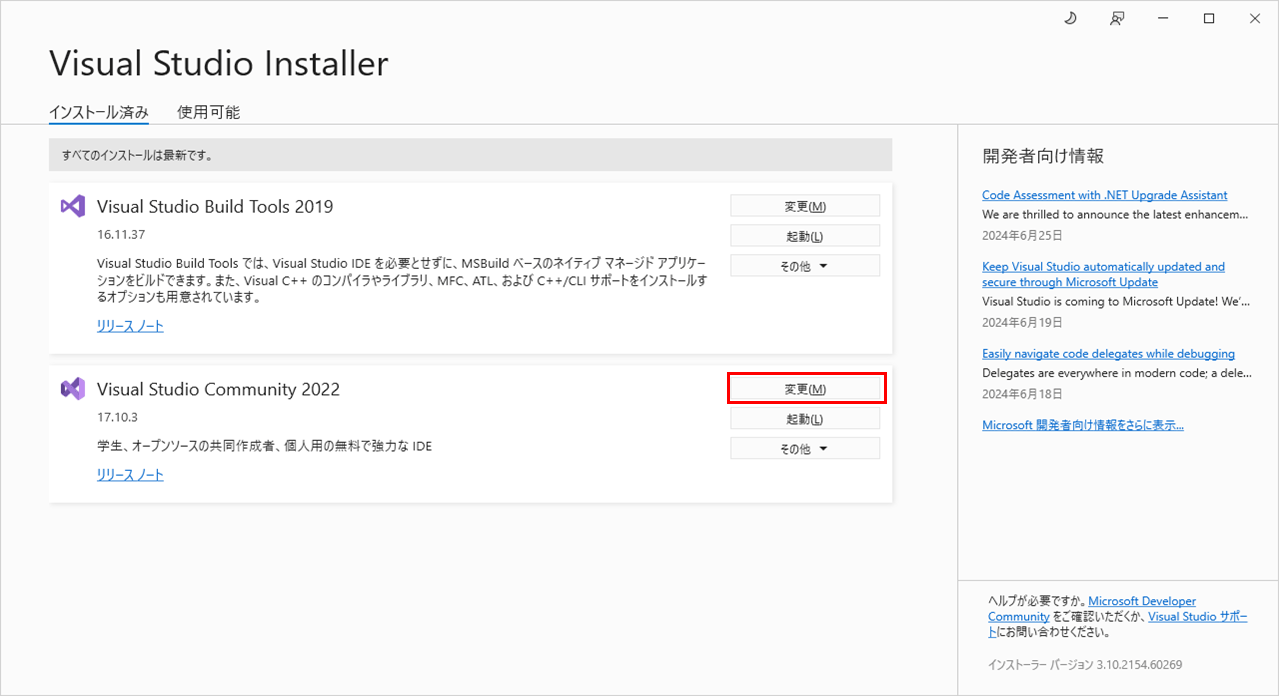
2)「Visual Studio Community 2022」の「変更」ボタンを押下する。
3)「ASP.NET と Web 開発」を選択し、「変更」ボタンを押下する。
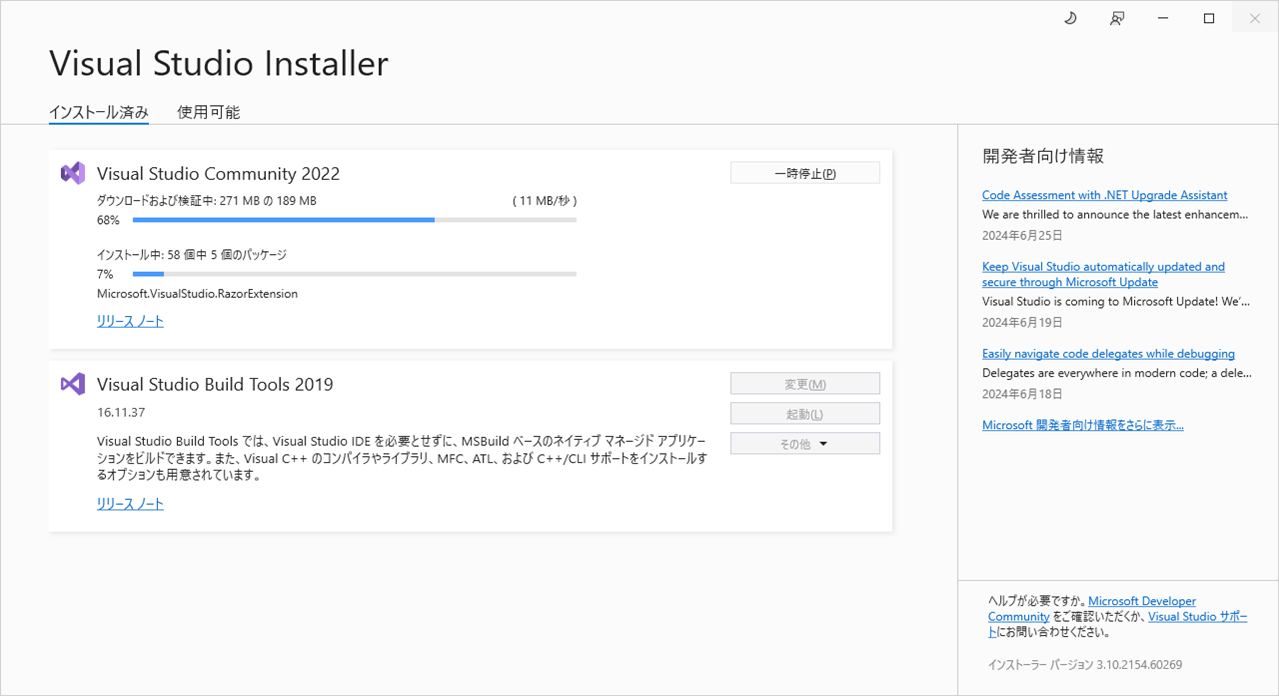
4) ダウンロード・インストールが進行中の画面表示例は、以下の通り。
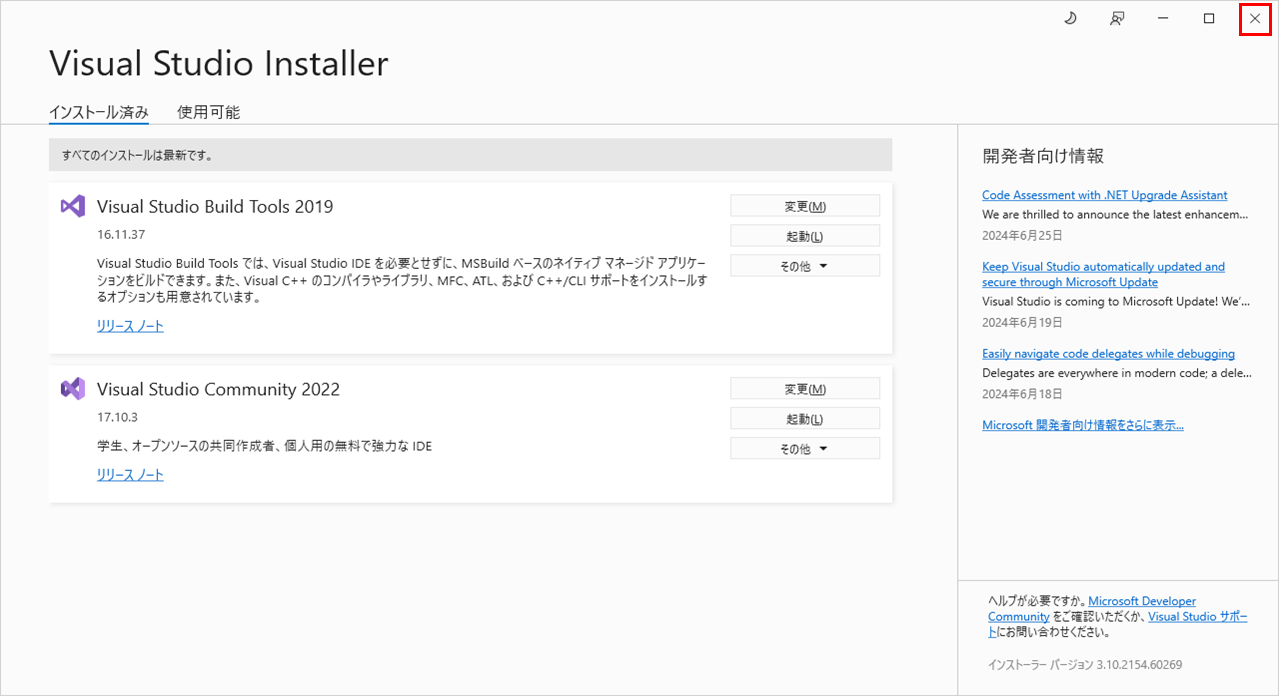
5) インストールが完了すると、以下の状態になるため、画面を閉じる。

C#でのWebアプリケーション作成
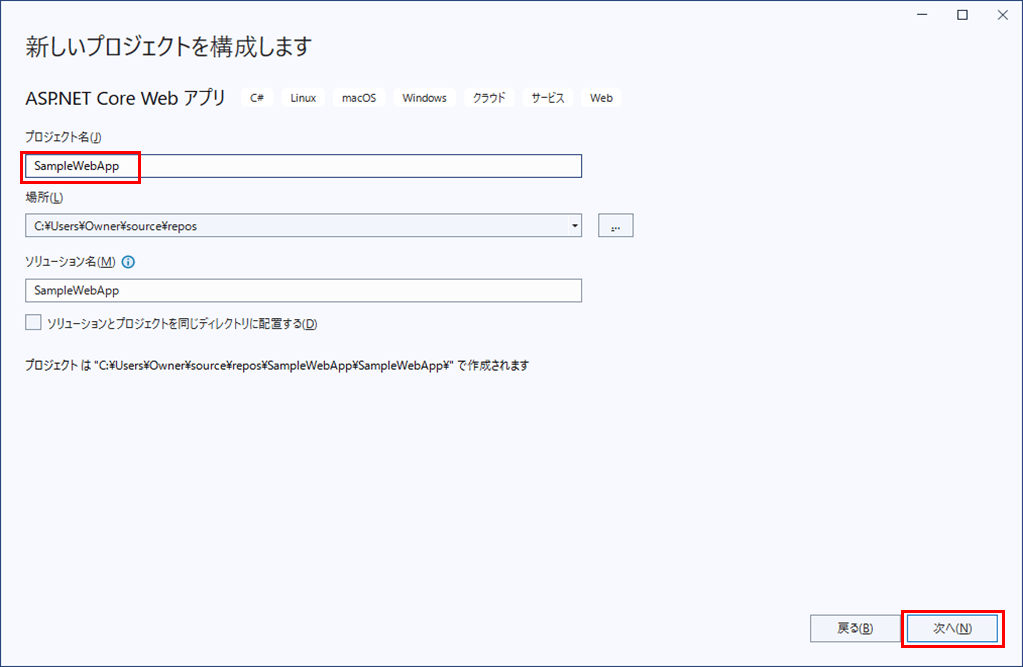
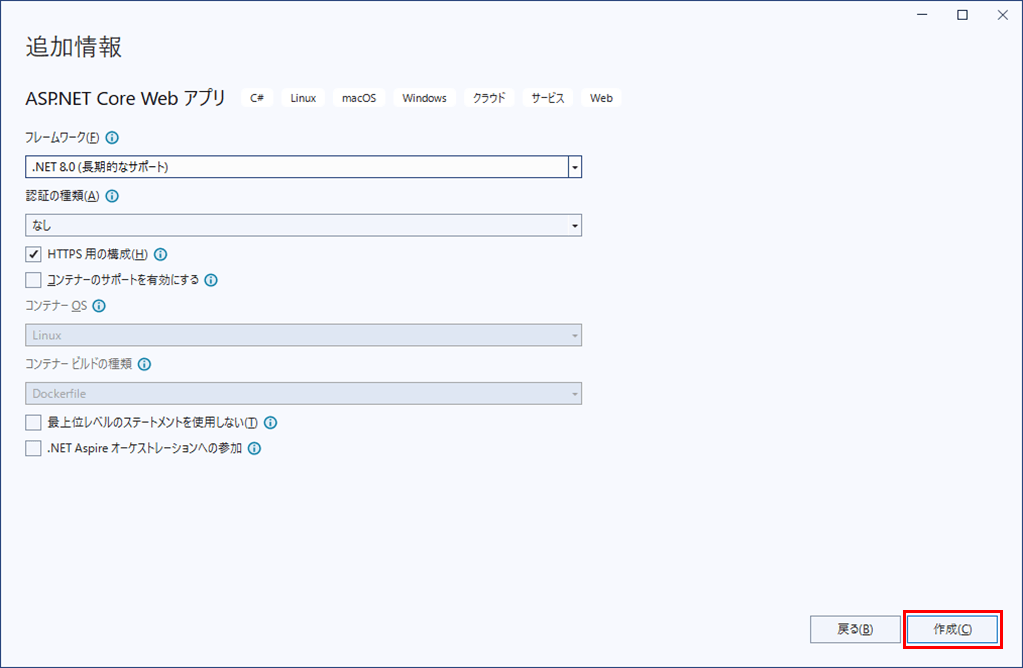
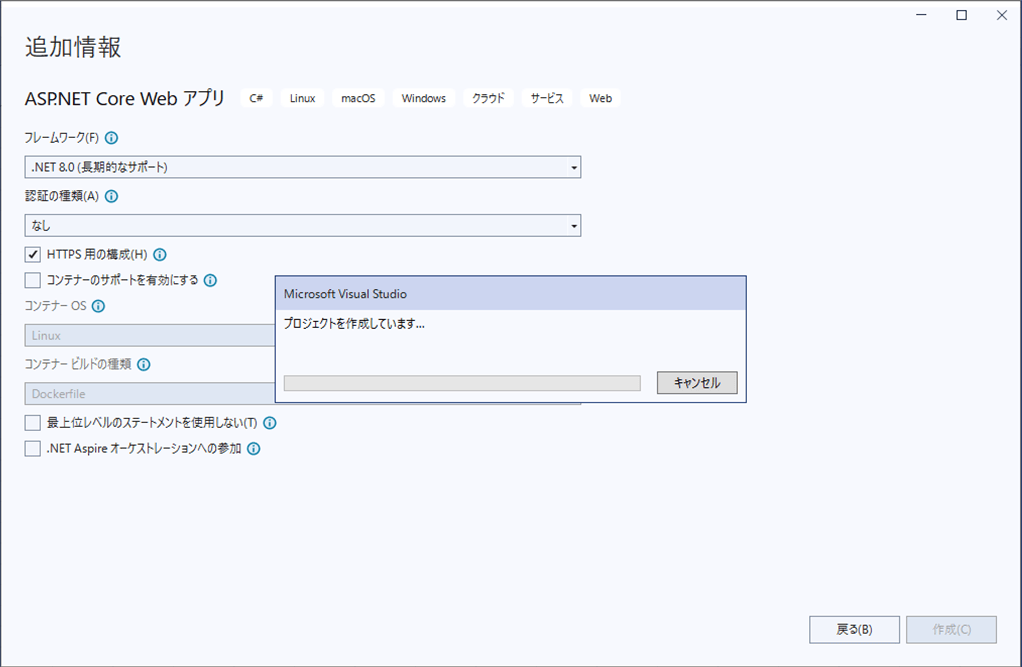
C#でWebアプリケーションを作成するには、「ASP.NET Core Web アプリ」を利用する。その作成手順は、以下の通り。
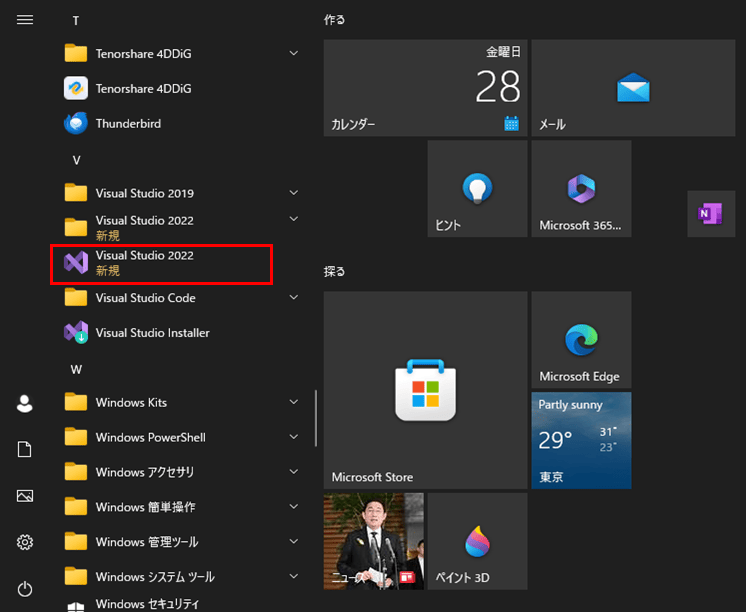
1) Windowsメニューから「Visual Studio 2022」を選択する。
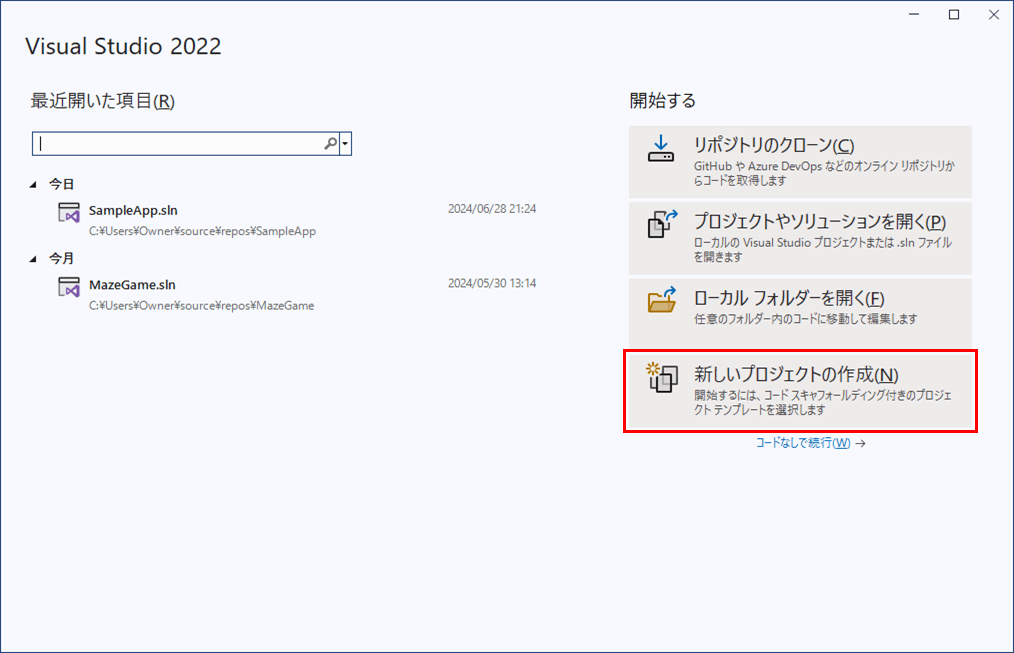
2) Visual Studioのホーム画面が開くので、「新しいプロジェクトの作成」を押下する。
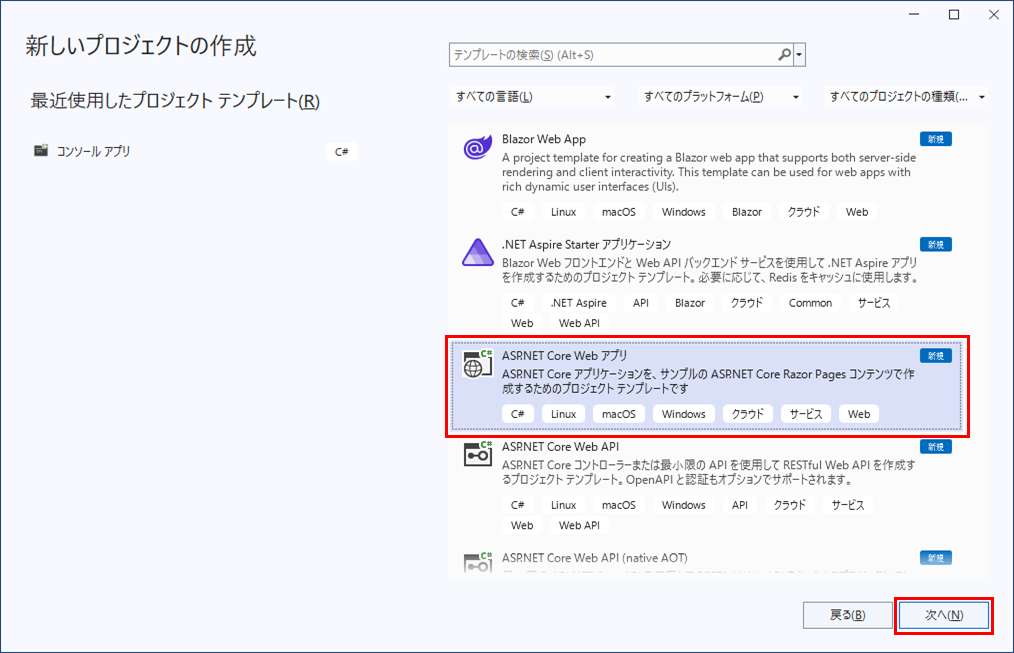
3)「ASP.NET Core Web アプリ」を選択し、「次へ」ボタンを押下する。
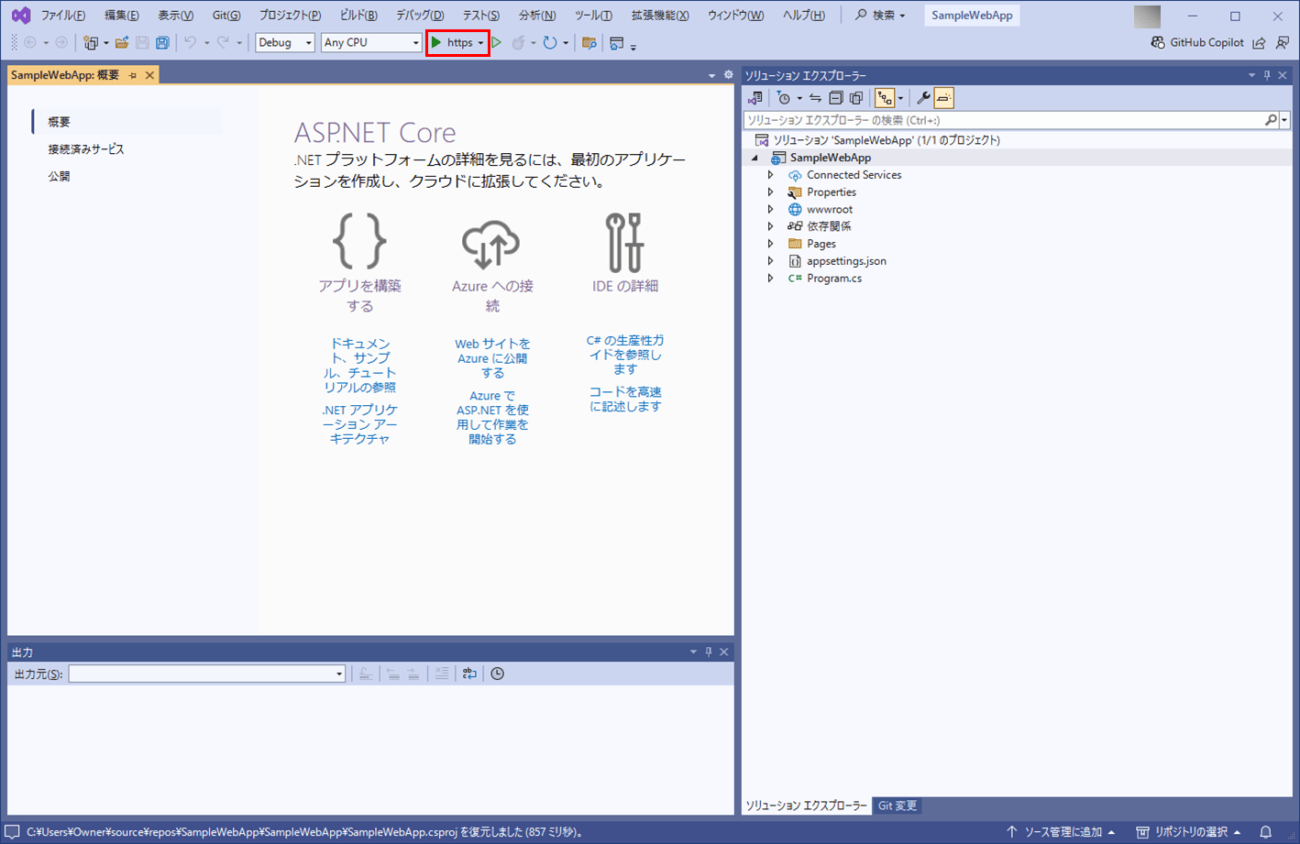
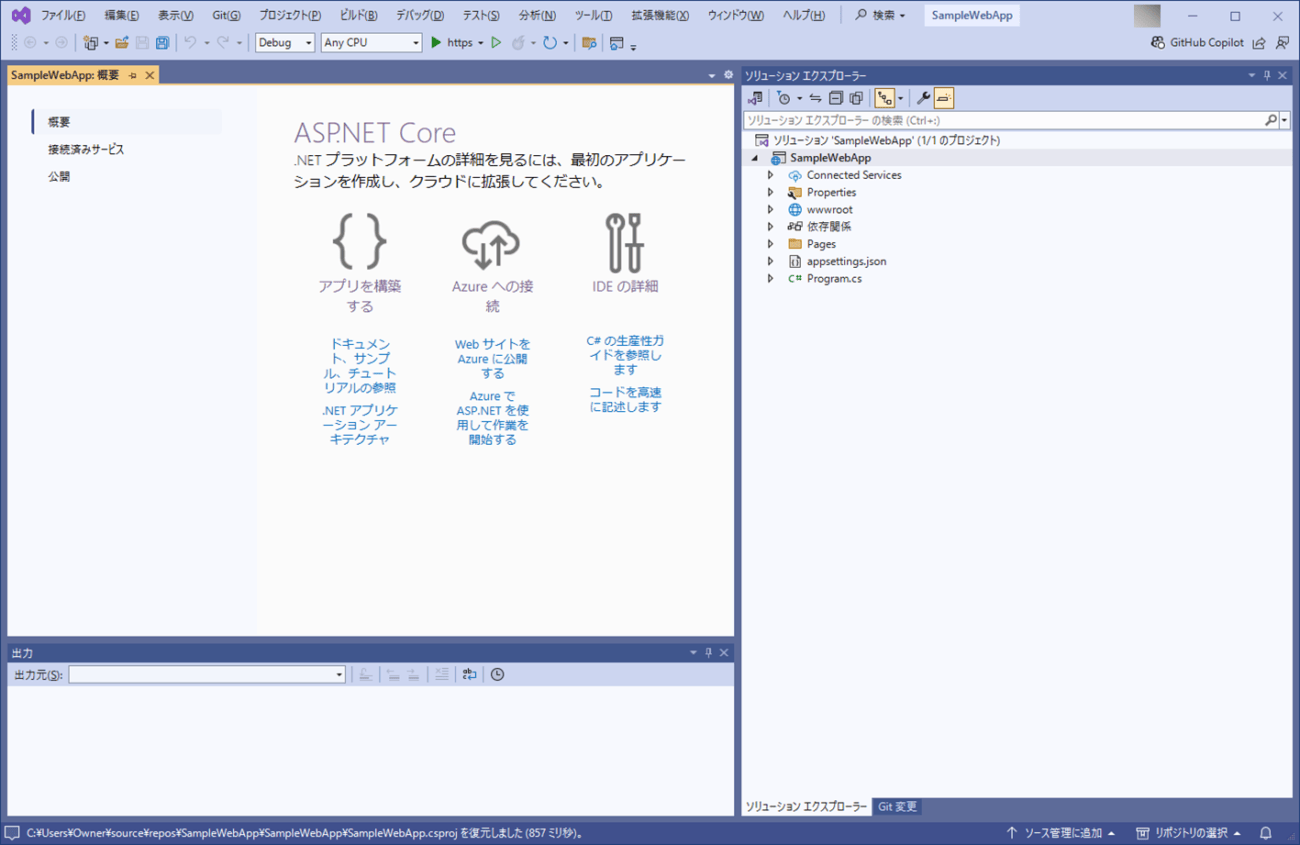
7) プロジェクトの作成が完了すると、以下の画面が表示される。
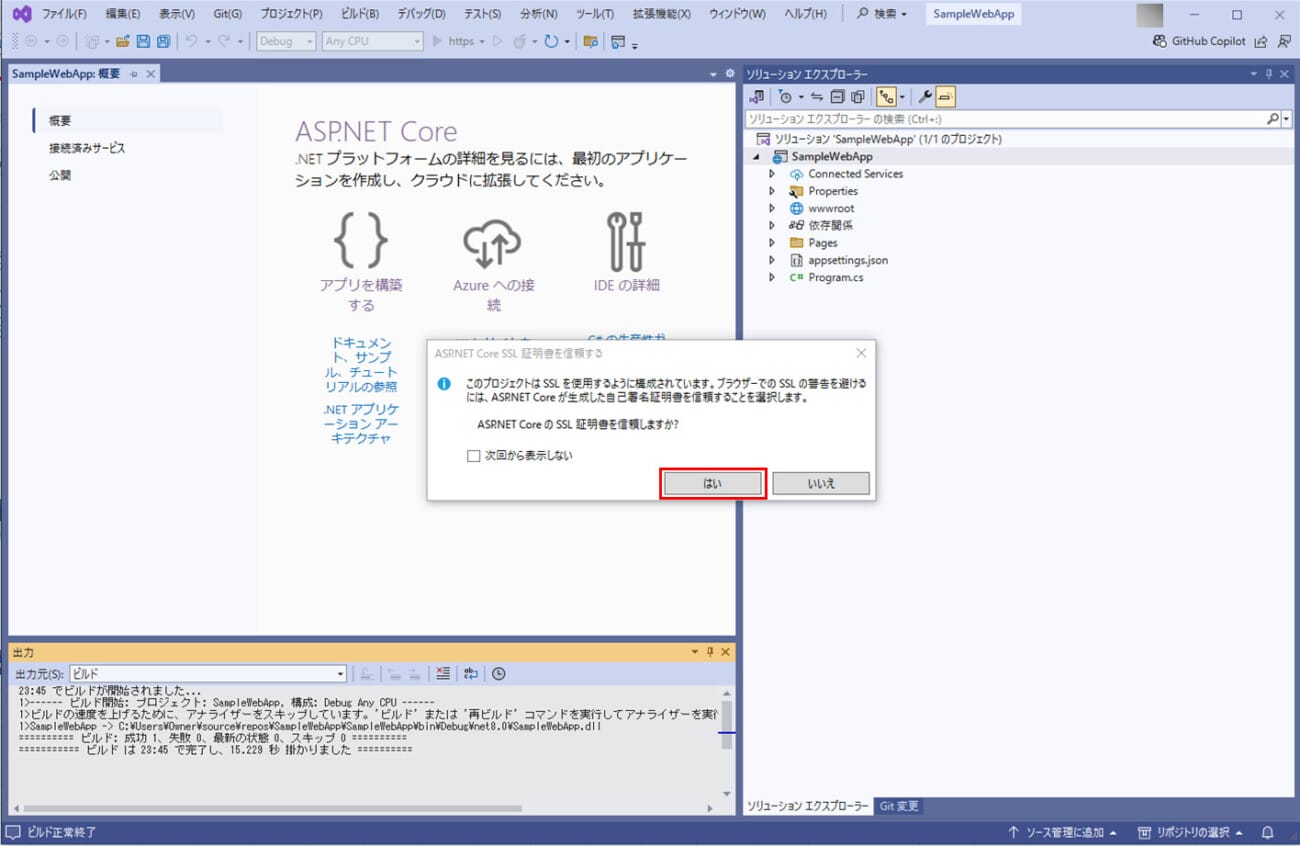
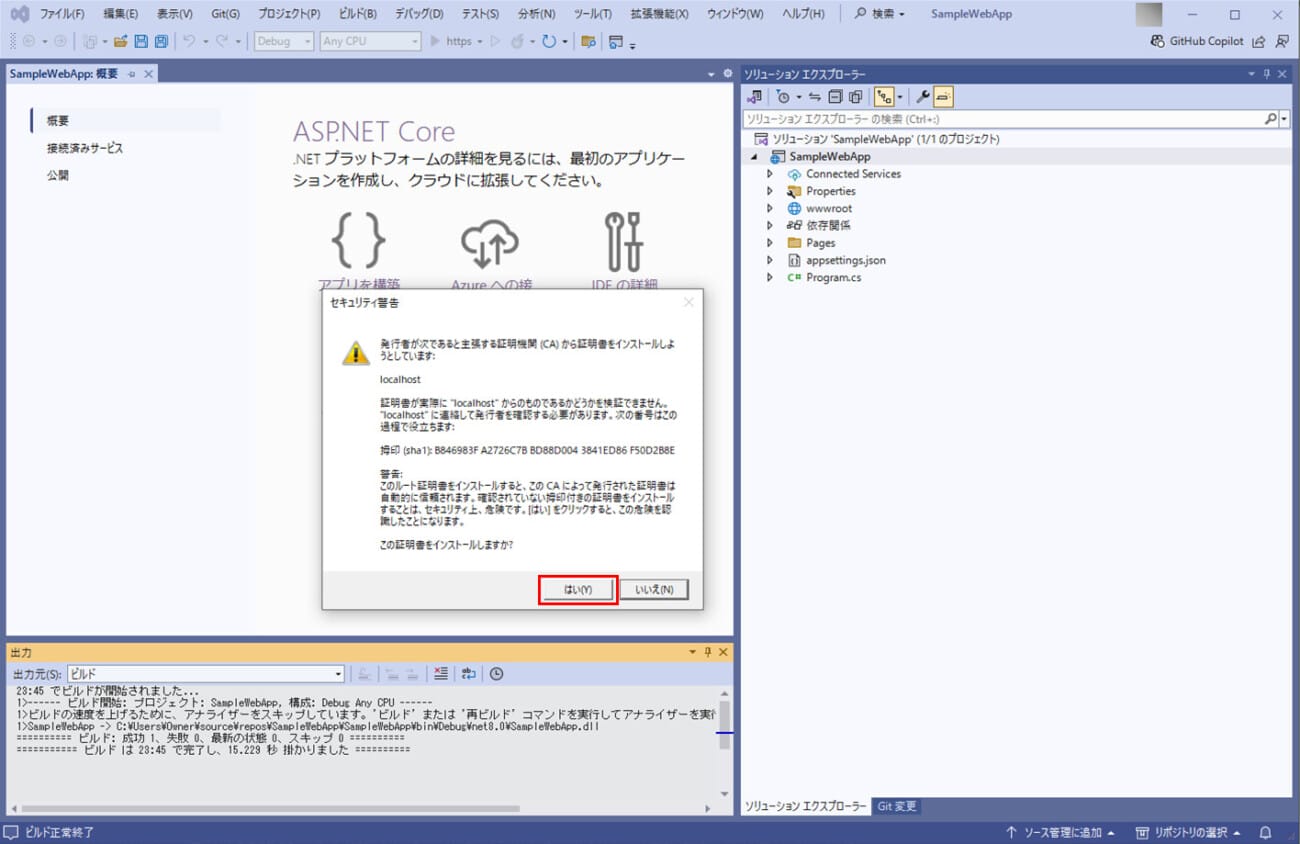
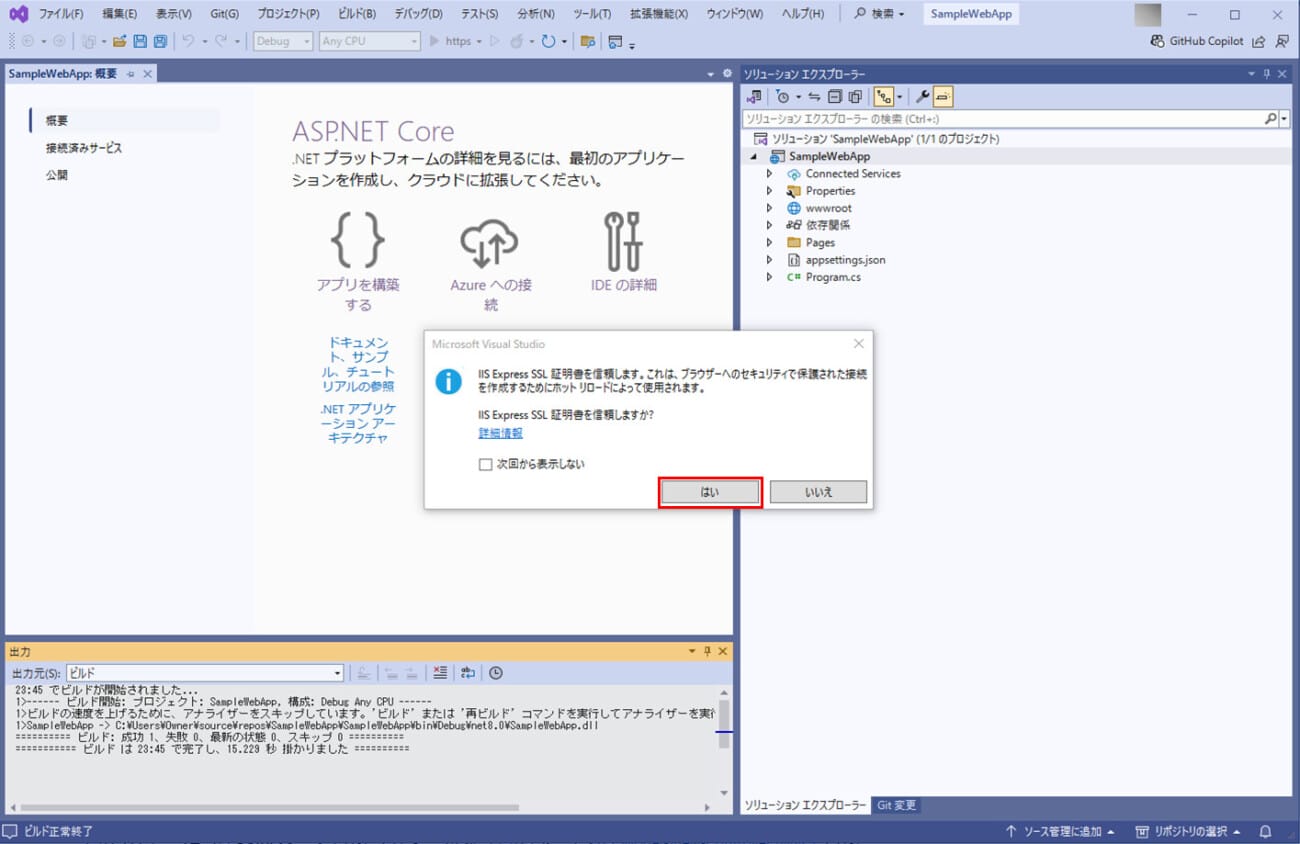
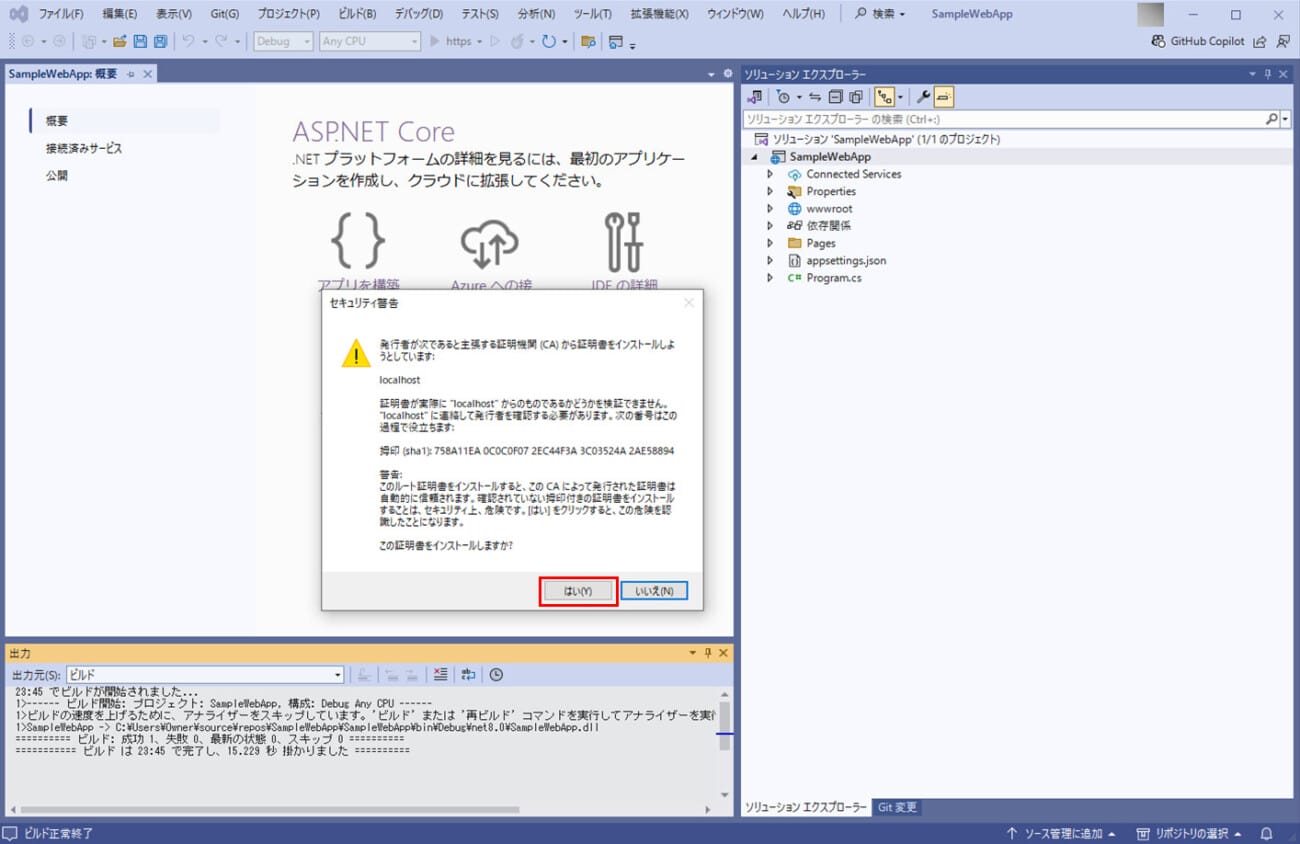
9) 以下のように、各証明書を信頼するか/インストールするか質問されるため、それぞれ「はい」ボタンを押下する。
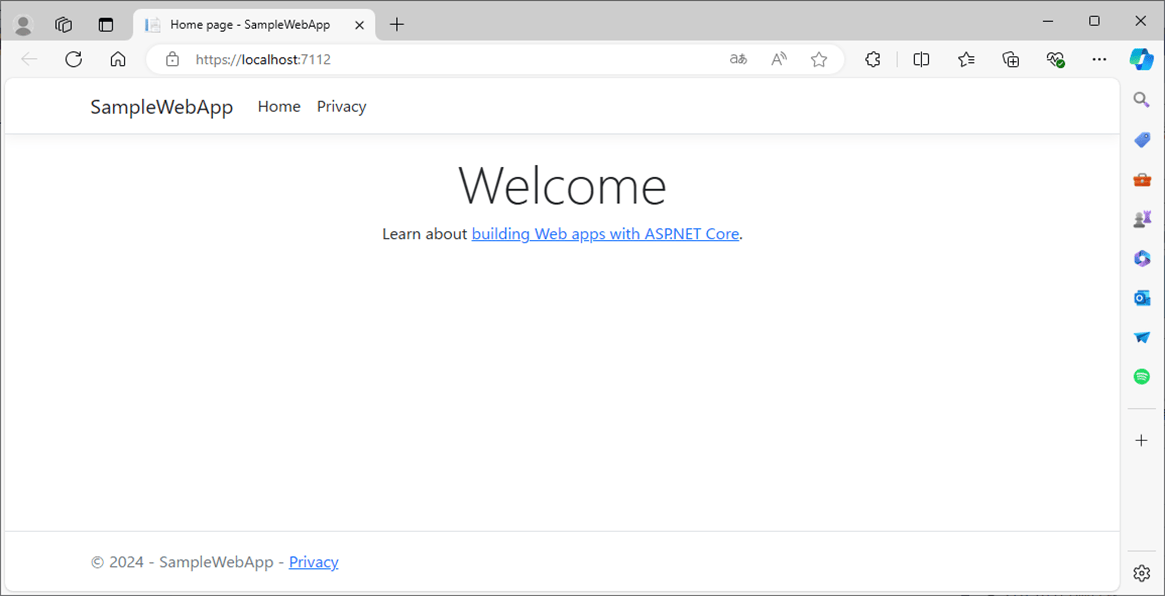
10) 少し待つと、以下のWelcome画面の表示が確認できる。
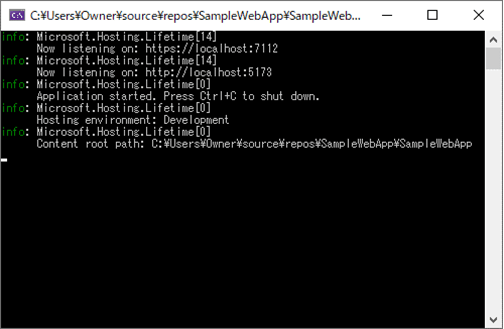
また、「Microsoft Visual Studio デバッグ コンソール」も、起動することが確認できる。
11) 画面を閉じるには、ブラウザの右上の×ボタンを押下する。
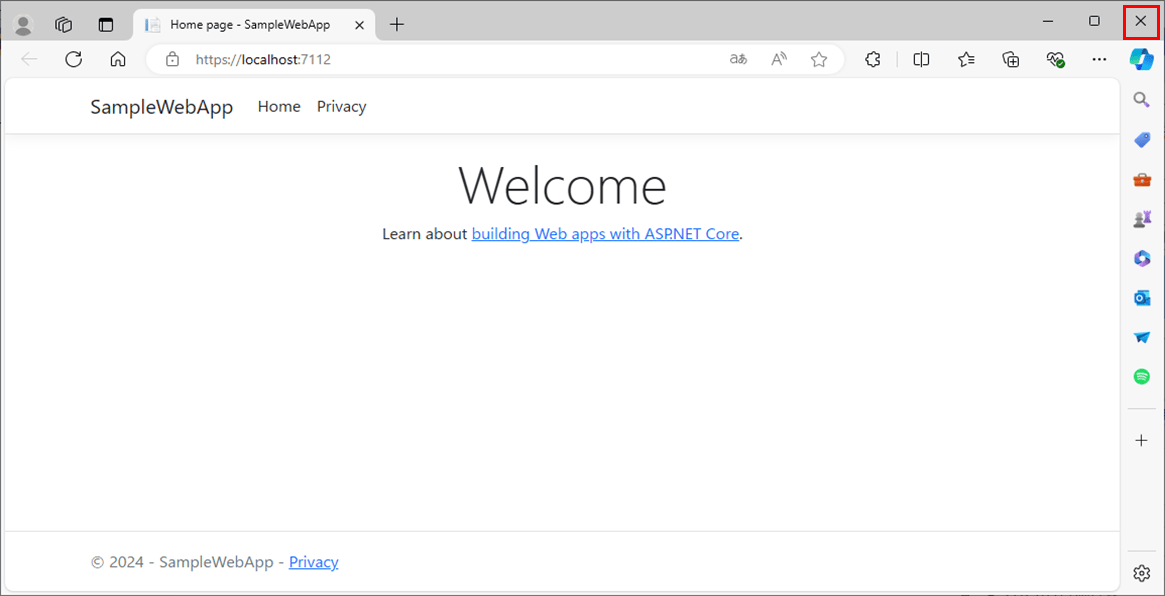
「Microsoft Visual Studio デバッグ コンソール」も、任意のキーを押下すると、この画面が閉じることが確認できる。
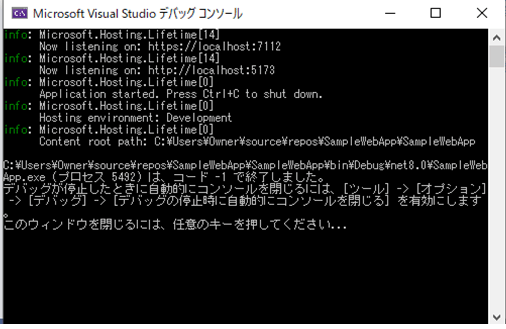

作成されたプログラムの内容
作成されたプログラムは、以下の構成になっている。
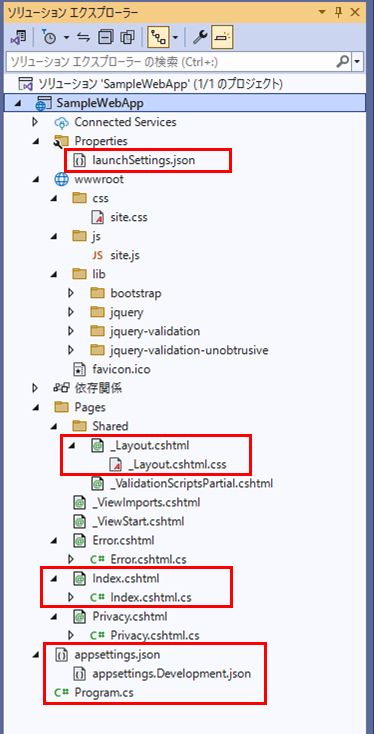
なお、赤枠のソースコードについては、後述する。
プログラム実行時に、画面に表示されたHTMLは「Index.cshtml」で、「Index.cshtml」に埋め込む値の設定は「Index.cshtml.cs」で行える。
@page
@model IndexModel
@{
    ViewData["Title"] = "Home page";
}

<div class="text-center">
    <h1 class="display-4">Welcome</h1>
    <p>Learn about <a href="https://learn.microsoft.com/aspnet/core">
        building Web apps with ASP.NET Core</a>.</p>
</div>
using Microsoft.AspNetCore.Mvc;
using Microsoft.AspNetCore.Mvc.RazorPages;
namespace SampleWebApp.Pages
{
public class IndexModel : PageModel
{
private readonly ILogger<IndexModel> _logger;
public IndexModel(ILogger<IndexModel> logger)
{
_logger = logger;
}
public void OnGet()
{
}
}
}また、「Index.cshtml」のタイトル・ヘッダー・フッターは、以下の「_Layout.cshtml」で定義している。
<!DOCTYPE html>
<html lang="en">
<head>
<meta charset="utf-8" />
<meta name="viewport" content="width=device-width, initial-scale=1.0" />
<title>@ViewData["Title"] - SampleWebApp</title>
<link rel="stylesheet" href="~/lib/bootstrap/dist/css/bootstrap.min.css" />
<link rel="stylesheet" href="~/css/site.css" asp-append-version="true" />
<link rel="stylesheet" href="~/SampleWebApp.styles.css" asp-append-version="true" />
</head>
<body>
<header>
<nav class="navbar navbar-expand-sm navbar-toggleable-sm navbar-light bg-white border-bottom box-shadow mb-3">
<div class="container">
<a class="navbar-brand" asp-area="" asp-page="/Index">SampleWebApp</a>
<button class="navbar-toggler" type="button" data-bs-toggle="collapse"
data-bs-target=".navbar-collapse" aria-controls="navbarSupportedContent"
aria-expanded="false" aria-label="Toggle navigation">
<span class="navbar-toggler-icon"></span>
</button>
<div class="navbar-collapse collapse d-sm-inline-flex justify-content-between">
<ul class="navbar-nav flex-grow-1">
<li class="nav-item">
<a class="nav-link text-dark" asp-area="" asp-page="/Index">Home</a>
</li>
<li class="nav-item">
<a class="nav-link text-dark" asp-area="" asp-page="/Privacy">Privacy</a>
</li>
</ul>
</div>
</div>
</nav>
</header>
<div class="container">
<main role="main" class="pb-3">
@RenderBody()
</main>
</div>
<footer class="border-top footer text-muted">
<div class="container">
© 2024 - SampleWebApp - <a asp-area="" asp-page="/Privacy">Privacy</a>
</div>
</footer>
<script src="~/lib/jquery/dist/jquery.min.js"></script>
<script src="~/lib/bootstrap/dist/js/bootstrap.bundle.min.js"></script>
<script src="~/js/site.js" asp-append-version="true"></script>
@await RenderSectionAsync("Scripts", required: false)
</body>
</html>さらに、「Index.cshtml」のCSSは、以下の「_Layout.cshtml.css」で定義している。
/* Please see documentation at
   https://learn.microsoft.com/aspnet/core/client-side/bundling-and-minification
   for details on configuring this project to bundle and minify static web assets. */

a.navbar-brand {
  white-space: normal;
  text-align: center;
  word-break: break-all;
}

a {
  color: #0077cc;
}

.btn-primary {
  color: #fff;
  background-color: #1b6ec2;
  border-color: #1861ac;
}

.nav-pills .nav-link.active, .nav-pills .show > .nav-link {
  color: #fff;
  background-color: #1b6ec2;
  border-color: #1861ac;
}

.border-top {
  border-top: 1px solid #e5e5e5;
}
.border-bottom {
  border-bottom: 1px solid #e5e5e5;
}

.box-shadow {
  box-shadow: 0 .25rem .75rem rgba(0, 0, 0, .05);
}

button.accept-policy {
  font-size: 1rem;
  line-height: inherit;
}

.footer {
  position: absolute;
  bottom: 0;
  width: 100%;
  white-space: nowrap;
  line-height: 60px;
}
なお、これらはRazorページを利用している。Razorページについては、以下を参照のこと。
https://learn.microsoft.com/ja-jp/aspnet/core/razor-pages/?view=aspnetcore-8.0&tabs=visual-studio
また、Webアプリケーションを起動し、「Index.cshtml」を表示する処理は、以下の「Program.cs」で行っている。
var builder = WebApplication.CreateBuilder(args);

// Add services to the container.
builder.Services.AddRazorPages();

var app = builder.Build();

// Configure the HTTP request pipeline.
if (!app.Environment.IsDevelopment())
{
    app.UseExceptionHandler("/Error");
    // The default HSTS value is 30 days. You may want to change
    // this for production scenarios, see https://aka.ms/aspnetcore-hsts.
    app.UseHsts();
}

app.UseHttpsRedirection();
app.UseStaticFiles();

app.UseRouting();

app.UseAuthorization();

app.MapRazorPages();

app.Run();
なお、Program.csの詳細は、以下のサイトを参照のこと。
https://tech-lab.sios.jp/archives/40718#Programcs
さらに、アプリケーションの起動設定は、以下の「launchSettings.json」で行っている。
{
  "$schema": "http://json.schemastore.org/launchsettings.json",
  "iisSettings": {
    "windowsAuthentication": false,
    "anonymousAuthentication": true,
    "iisExpress": {
      "applicationUrl": "http://localhost:54739",
      "sslPort": 44395
    }
  },
  "profiles": {
    "http": {
      "commandName": "Project",
      "dotnetRunMessages": true,
      "launchBrowser": true,
      "applicationUrl": "http://localhost:5173",
      "environmentVariables": {
        "ASPNETCORE_ENVIRONMENT": "Development"
      }
    },
    "https": {
      "commandName": "Project",
      "dotnetRunMessages": true,
      "launchBrowser": true,
      "applicationUrl": "https://localhost:7112;http://localhost:5173",
      "environmentVariables": {
        "ASPNETCORE_ENVIRONMENT": "Development"
      }
    },
    "IIS Express": {
      "commandName": "IISExpress",
      "launchBrowser": true,
      "environmentVariables": {
        "ASPNETCORE_ENVIRONMENT": "Development"
      }
    }
  }
}
その他のアプリケーション設定は、以下の「appsettings.json」「appsettings.Development.json」で行っている。
{
  "Logging": {
    "LogLevel": {
      "Default": "Information",
      "Microsoft.AspNetCore": "Warning"
    }
  },
  "AllowedHosts": "*"
}
{
"DetailedErrors": true,
"Logging": {
"LogLevel": {
"Default": "Information",
"Microsoft.AspNetCore": "Warning"
}
}
}要点まとめ
- Visual Studio で、「ASP.NET と Web 開発」ワークロード内の「ASP.NET Core Web アプリ」を選択すると、C#によるWebアプリケーションを作成することができる。
