pytestとは、Python用に設計された単体テスト用のフレームワーク(テスティングフレームワーク)で、Flaskを用いたWebアプリケーションで、pytestを利用したテストを行うことができる。
今回は、pytestを用いてFlaskを用いたWebアプリケーションのテストを実装してみたので、そのサンプルプログラムを共有する。
前提条件
下記記事のFlaskによるチェック処理の実装が完了していること。

やってみたこと
pytestのインストール
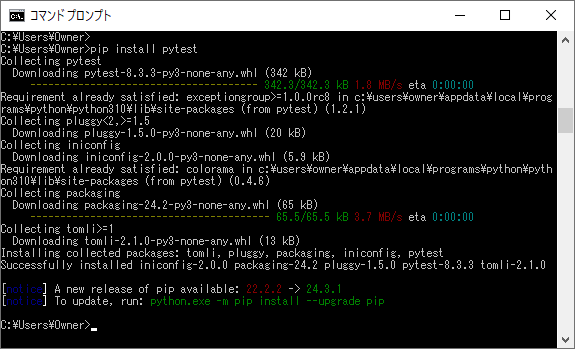
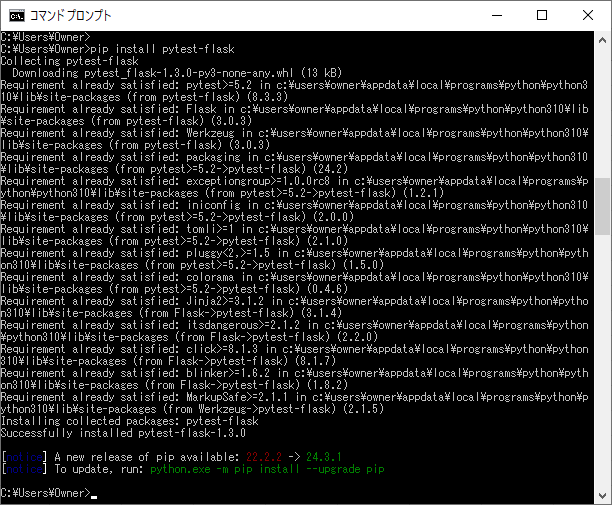
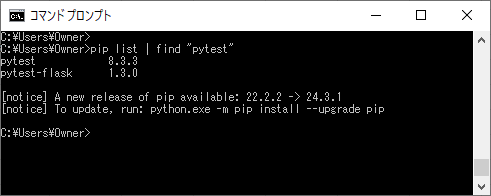
2024年11月24日現在の最新バージョンのpytest(8.3.3)とpytest-flask(1.3.0)をインストールする。その手順は、以下の通り。
1) コマンドプロンプトで「pip install pytest」コマンドを実行し、最新バージョンのpytestをインストールする。
2)「pip install pytest-flask」コマンドを実行し、最新バージョンのpytest-flaskをインストールする。
3)「pip list | find “pytest”」コマンドを実行すると、以下のように、インストールしたpytest、pytest-flaskが確認できる。

サンプルプログラムの作成
作成したサンプルプログラムの構成は、以下の通り。
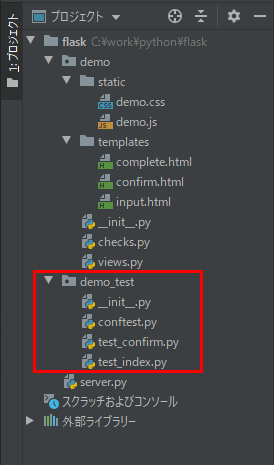
なお、上記の赤枠は、前提条件のプログラムから追加したプログラムである。
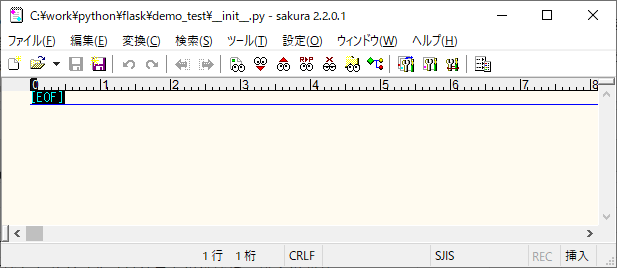
__init__.py は以下の通りで、空ファイルであるが、demo_testフォルダ内でpytestが実行できるようにしている。
また、conftest.pyの内容は以下の通りで、各テストコードで共通する、テスト用クライアント生成処理を定義している。
import pytest
from demo import app

# 各テストコードで共通する処理
@pytest.fixture
def create_client():
    app.config['TESTING'] = True
    return app.test_client()
さらに、初期表示のテストは以下の通りで、テスト用クライアントでviews.pyのindexメソッドを呼び出し、呼出後のHTTPステータスコードと遷移先画面のタイトルを確認している。
# 初期表示のテスト
def test_index(create_client):
    # views.pyのindexメソッドを呼び出し
    result = create_client.get('/')

    # HTTPステータスコードと遷移先画面のタイトルを確認
    assert 200 == result.status_code
    assert "<title>入力画面</title>" in result.data.decode('utf-8')
また、入力画面における確認ボタン押下処理のテストは以下の通りで、テスト用クライアントでviews.pyのconfirmメソッドを呼び出し、確認画面に遷移する場合と入力チェックエラーになる場合の処理を確認している。
import pytest

# 入力項目の設定(正常)
@pytest.fixture
def create_post_data_normal():
    post_data = dict()
    post_data["name"] = "テスト プリン1"
    post_data["birthYear"] = "2005"
    post_data["birthMonth"] = "9"
    post_data["birthDay"] = "21"
    post_data["sex"] = "2"
    post_data["memo"] = "これはテストです。"
    post_data["checked"] = "on"
    return post_data

# 入力項目の設定(全項目なし)
@pytest.fixture
def create_post_data_none():
    post_data = dict()
    post_data["name"] = ""
    post_data["birthYear"] = ""
    post_data["birthMonth"] = ""
    post_data["birthDay"] = ""
    post_data["sex"] = ""
    post_data["memo"] = ""
    post_data["checked"] = ""
    return post_data

# 入力項目の設定(全項目あり_生年月日エラー)
@pytest.fixture
def create_post_data_err_birthday():
    post_data = dict()
    post_data["name"] = "テスト プリン1"
    post_data["birthYear"] = "2012"
    post_data["birthMonth"] = "2"
    post_data["birthDay"] = "31"
    post_data["sex"] = "2"
    post_data["memo"] = "これはテストです。"
    post_data["checked"] = "on"
    return post_data

# 正常時のテスト
def test_confirm_normal(create_client, create_post_data_normal):
    # views.pyのconfirmメソッドを呼び出し
    result = create_client.post("/confirm", data=create_post_data_normal)

    # HTTPステータスコードと遷移先画面のタイトルを確認
    assert 200 == result.status_code
    assert "<title>確認画面</title>" in result.data.decode('utf-8')

    # 遷移先画面に入力項目の各値が設定されていることを確認
    assert "テスト プリン1" in result.data.decode('utf-8')
    assert "2005年9月21日" in result.data.decode('utf-8')
    assert "女" in result.data.decode('utf-8')
    assert "これはテストです。" in result.data.decode('utf-8')
    assert "確認済" in result.data.decode('utf-8')

# 必須入力エラー時のテスト
def test_confirm_error_none(create_client, create_post_data_none):
    # views.pyのconfirmメソッドを呼び出し
    result = create_client.post("/confirm", data=create_post_data_none)

    # HTTPステータスコードと遷移先画面のタイトルを確認
    assert 200 == result.status_code
    assert "<title>入力画面</title>" in result.data.decode('utf-8')

    # それぞれのエラーメッセージが表示されていることを確認
    assert "名前を入力してください。" in result.data.decode('utf-8')
    assert "生年月日を入力してください。" in result.data.decode('utf-8')
    assert "性別を指定してください。" in result.data.decode('utf-8')
    assert "入力確認をチェックしてください。" in result.data.decode('utf-8')

# 生年月日存在チェックエラー時のテスト
def test_confirm_normal(create_client, create_post_data_err_birthday):
    # views.pyのconfirmメソッドを呼び出し
    result = create_client.post("/confirm", data=create_post_data_err_birthday)

    # HTTPステータスコードと遷移先画面のタイトルを確認
    assert 200 == result.status_code
    assert "<title>入力画面</title>" in result.data.decode('utf-8')

    # 生年月日存在チェックエラーのメッセージが表示されていることを確認
    assert "生年月日が存在しない日付になっています。" in result.data.decode('utf-8')
その他のソースコード内容は、以下のサイトを参照のこと。
https://github.com/purin-it/python/tree/master/make-flask-pytest/

サンプルプログラムの実行結果
サンプルプログラムの実行結果は、以下の通り。
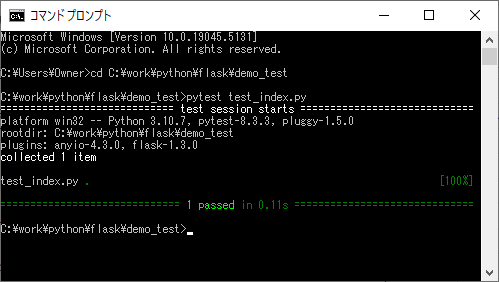
1) コマンドプロンプトでdemo_testフォルダに移動し、pytestコマンドでtest_index.pyを実行した結果は、以下の通り。
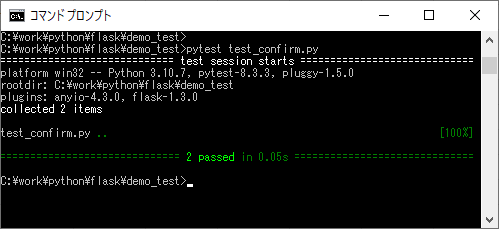
2) pytestコマンドでtest_confirm.pyを実行した結果は、以下の通り。
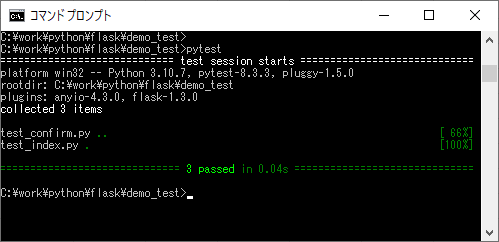
3) pytestコマンドを実行すると、以下のように、test_index.py・test_confirm.pyの両方が実行されることが確認できる。
要点まとめ
- pytestとは、Python用に設計された単体テスト用のフレームワーク(テスティングフレームワーク)で、Flaskを用いたWebアプリケーションで、pytestを利用したテストを行うことができる。


