ControllerAdviceアノテーションを適用したクラス内で、InitBinderアノテーションを付与したメソッドを利用すると、そのメソッド内で指定したパラメータ変換処理を実装することができる。
今回は、Spring Boot上でControllerAdviceアノテーションを利用したパラメータ変換処理を実装してみたので、そのサンプルプログラムを共有する。
前提条件
下記記事の実装が完了していること。

サンプルプログラムの作成
作成したサンプルプログラムの構成は以下の通り。

なお、上記の赤枠は、前提条件のプログラムから変更したプログラムである。
build.gradleの内容は以下の通りで、Apache Commons Langを利用するための設定を追加している。
plugins {
	id 'org.springframework.boot' version '2.1.7.RELEASE'
	id 'java'
}

apply plugin: 'io.spring.dependency-management'

group = 'com.example'
version = '0.0.1-SNAPSHOT'
sourceCompatibility = '1.8'

repositories {
	mavenCentral()
}

configurations {
	//log4j2を利用するため、Spring BootデフォルトのLogbackを利用しないよう設定
	all*.exclude module : 'spring-boot-starter-logging'
}

dependencies {
	implementation 'org.springframework.boot:spring-boot-starter-thymeleaf'
	implementation 'org.springframework.boot:spring-boot-starter-web'
	testImplementation 'org.springframework.boot:spring-boot-starter-test'
	compileOnly 'org.projectlombok:lombok:1.18.10'
	annotationProcessor 'org.projectlombok:lombok:1.18.10'
	compile files('lib/ojdbc6.jar')
	implementation 'org.mybatis.spring.boot:mybatis-spring-boot-starter:2.1.1'
	compile group: 'org.springframework.data', name: 'spring-data-commons-core', version: '1.1.0.RELEASE'
	//log4j2を利用するための設定
	compile group: 'org.apache.logging.log4j', name: 'log4j-api', version: '2.12.1'
	compile group: 'org.apache.logging.log4j', name: 'log4j-core', version: '2.12.1'
	//AOPを利用するための設定
	implementation 'org.springframework.boot:spring-boot-starter-aop'
	//log4j2の設定でymlファイルを利用するための設定
	compile group: 'com.fasterxml.jackson.dataformat', name: 'jackson-dataformat-yaml', version: '2.10.1'
	compile group: 'com.fasterxml.jackson.core', name: 'jackson-core', version: '2.10.1'
	compile group: 'com.fasterxml.jackson.core', name: 'jackson-databind', version: '2.10.1'
	//Apache Common JEXLを利用するための設定
	compile group: 'org.apache.commons', name: 'commons-jexl3', version: '3.0'
	//Apache Commons Langを利用するための設定
	compile group: 'org.apache.commons', name: 'commons-lang3', version: '3.0'
}
また、DemoControllerAdviceの内容は以下の通りで、ControllerAdviceアノテーションを適用したクラスのInitBinderアノテーションを付与したメソッド内で、文字列の前後の空白を取り除きサニタイジングする処理(DemoStringConverter)を追加している。
package com.example.demo;

import org.springframework.web.bind.WebDataBinder;
import org.springframework.web.bind.annotation.ControllerAdvice;
import org.springframework.web.bind.annotation.InitBinder;

@ControllerAdvice
public class DemoControllerAdvice {

    @InitBinder
    public void initBinder(WebDataBinder dataBinder) {
        //文字列の前後の空白を取り除き、サニタイジングする
        dataBinder.registerCustomEditor(
                String.class, new DemoStringConverter(false));
    }

}
さらに、DemoStringConverterの内容は以下の通りで、文字列の空白を取り除き、サニタイジングする処理を実装している。
package com.example.demo;

import org.springframework.lang.Nullable;
import java.beans.PropertyEditorSupport;
import org.apache.commons.lang3.StringEscapeUtils;

public class DemoStringConverter extends PropertyEditorSupport {

    private final boolean emptyAsNull;

    /**
     * コンストラクタ
     * @param emptyAsNull 空文字をnullに変換するか
     */
    public DemoStringConverter(boolean emptyAsNull) {
        this.emptyAsNull = emptyAsNull;
    }

    @Override
    public void setAsText(@Nullable String text) {
        if (text == null) {
            setValue(null);
        }
        else {
            //文字列の空白を取り除き、サニタイジングする
            String value = StringEscapeUtils.escapeHtml4(text.trim());
            if (this.emptyAsNull && "".equals(value)) {
                setValue(null);
            }
            else {
                setValue(value);
            }
        }
    }

    @Override
    public String getAsText() {
        Object value = getValue();
        return (value != null ? value.toString() : "");
    }
}
なお、サニタイジングについては、以下のサイトを参照のこと。
https://cybersecurity-jp.com/security-measures/33684
その他のソースコード内容は、以下のサイトを参照のこと。
https://github.com/purin-it/java/tree/master/spring-boot-controller-advice-initbinder/demo
サンプルプログラムの実行結果
サンプルプログラムの実行結果は、以下の通り。
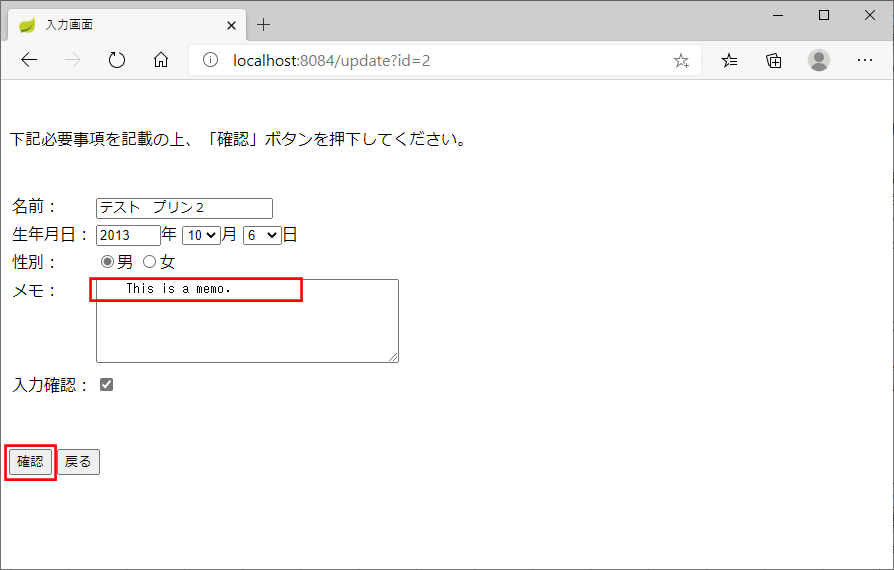
1) Spring Bootアプリケーションを起動し、「http://(サーバー名):(ポート番号)/」とアクセスし、任意のユーザーデータの入力画面を開き、以下のように、メモの先頭に空白文字を設定し「確認」ボタンを押下
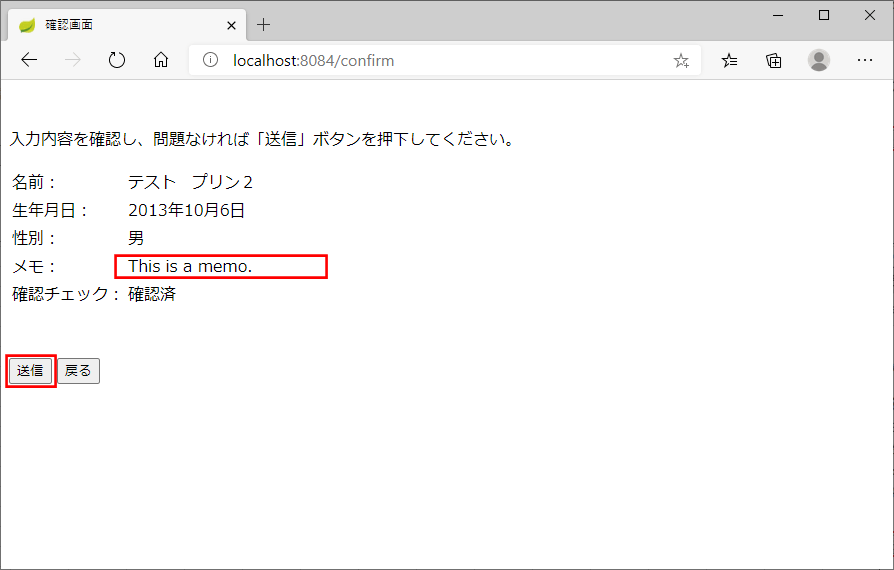
2) 以下のように、確認画面に遷移し、メモの先頭の空白文字が削除されていることが確認できるので、「送信」ボタンを押下
4) 変更後のデータを入力画面で確認すると、以下のように、確認画面に遷移し、メモの先頭の空白文字が削除されていることが確認できる
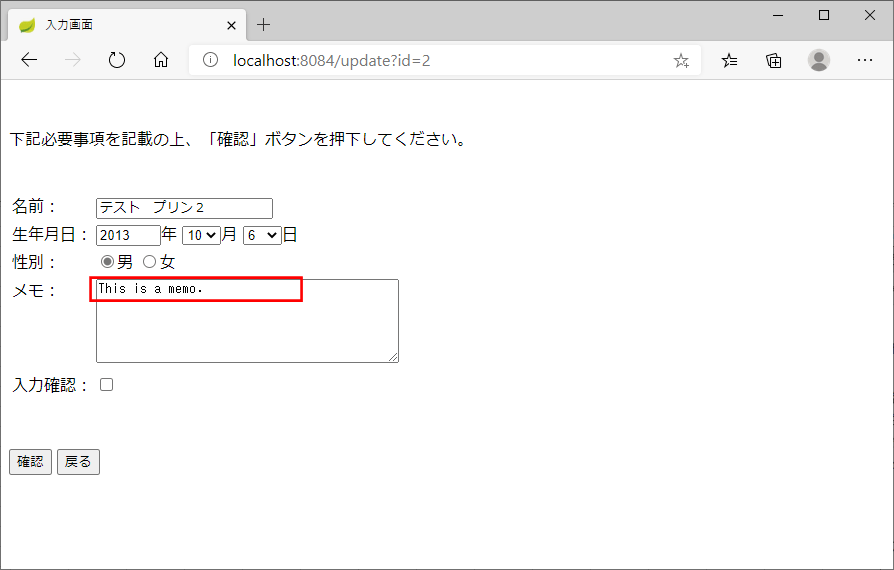
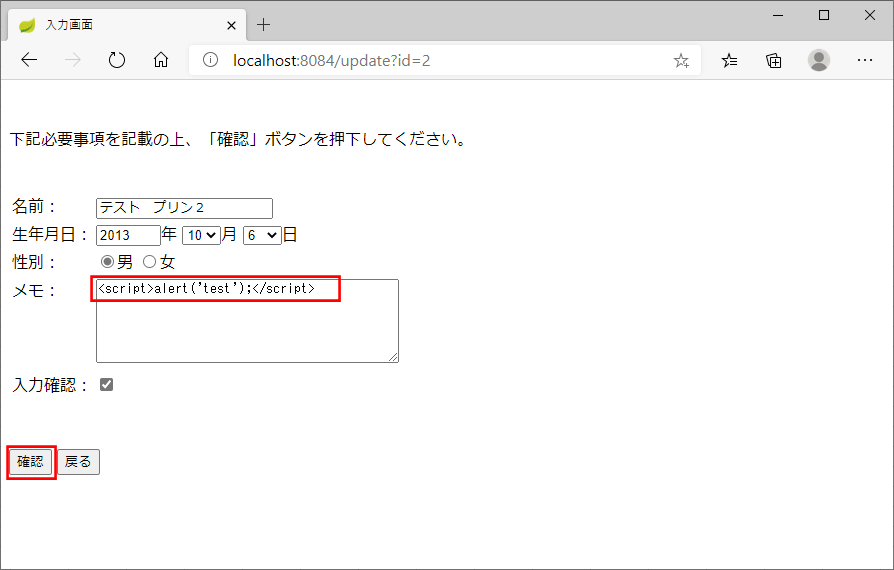
5) 任意のユーザーデータの入力画面を開き、以下のように、メモにサニタイジングが必要な文字を指定し「確認」ボタンを押下
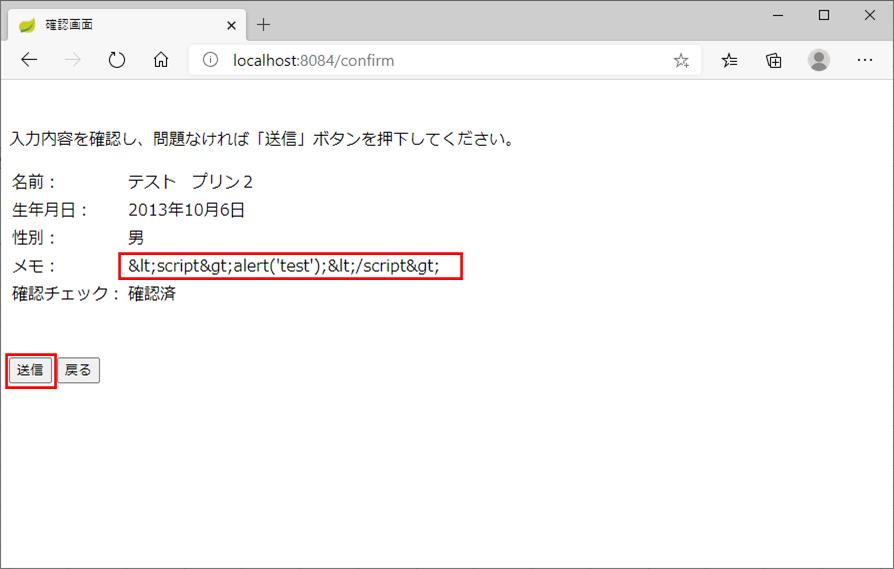
6) 以下のように、確認画面に遷移し、サニタイジングにより、< ⇒ < > ⇒ > に変わっていることが確認できるので、「送信」ボタンを押下
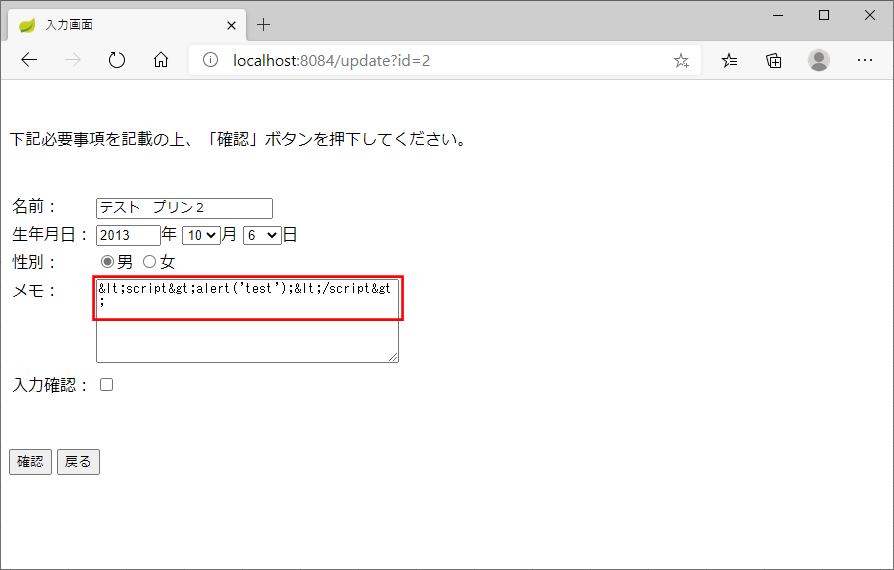
8) 変更後のデータを入力画面で確認すると、以下のように、確認画面に遷移し、サニタイジングにより、< ⇒ < > ⇒ > に変わっていることが確認できる
要点まとめ
- ControllerAdviceアノテーションを適用したクラス内で、InitBinderアノテーションを付与したメソッドを利用すると、そのメソッド内で指定したパラメータ変換処理を実装することができる。
